Top 3 SEO Checklists For On-Page & Technical SEO In 2024 via @sejournal, @WixStudio
This post was sponsored by Wix. The opinions expressed in this article are the sponsor’s own.
In the last 18 months, conversations about SEO have been dominated by artificial intelligence.
New ways of working and new user journeys for search visitors have come to the forefront.
In 2024, we can clearly see that there’s a great mix of “old hat” and “new hat” SEO best practices that you can start implementing right now.
To help you keep up with the current SEO best practices, we’ve created a series of:
Why Use SEO Checklists?
Doing SEO is often a bit like conducting a symphony.
There are lots of SEO activities, big and small, taking place across each website, and each SEO task, whether it be on-page or technical, contributes to the larger success of your website.
Just as a conductor has their sheet music, the best consultants and agencies use SEO checklists, templates, cheat sheets, and other project management documents to make sure everything is on track.
The medium of the SEO checklist has evolved from being as simple as a few items scribbled on the back of an envelope to something as complex as a dynamically generated interface within your CMS, offering AI functionality and integration with your favorite tools.
This versatility means that they can be reworked to suit most requirements.
In the sake of versatility, here are three, high-level types of SEO checklists that can help you elevate your brand’s website.
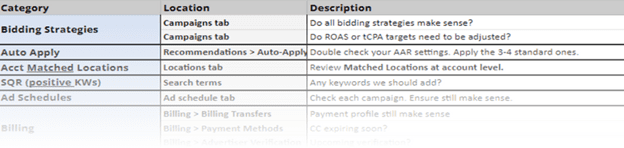
1. SEO Checklists On Shared Documents
If you’ve been in the industry for a while, you’re probably familiar with using a spreadsheet to keep track of SEO progress.
Now, we’re living in the fast lane, with the ability to leverage shared SEO. Easily transferrable, this can be as complex or simple as required.
 Image created by Wix, February 2024
2. Dynamic, Real-Time SEO Checklists
Fast forward to a next-generation SEO checklist: The Dynamic SEO Checklist.
A dynamic SEO checklist responds to updates in content in real-time.
This means that anytime a change is made to your website, you get a series of next steps to execute to make your content rank.
Examples Of Real-Time SEO Checklists
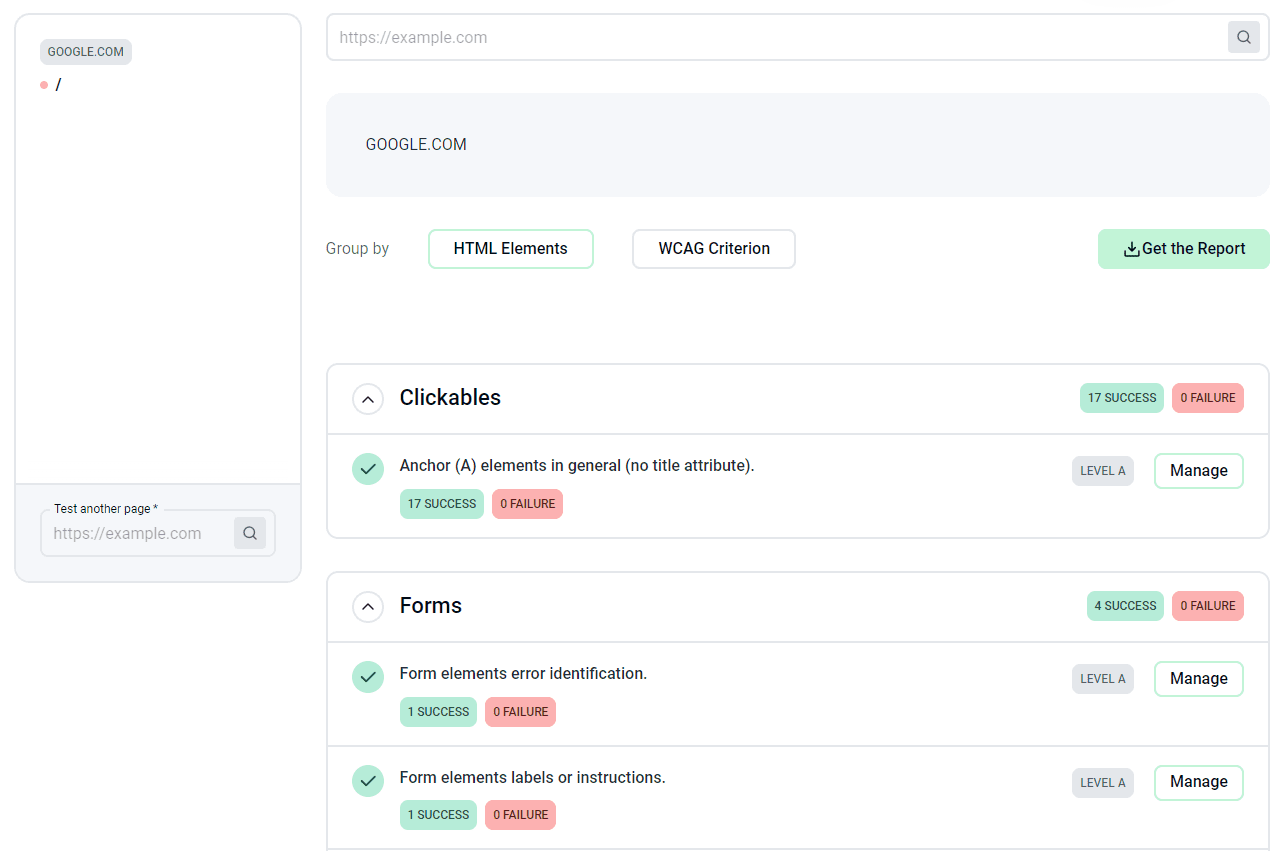
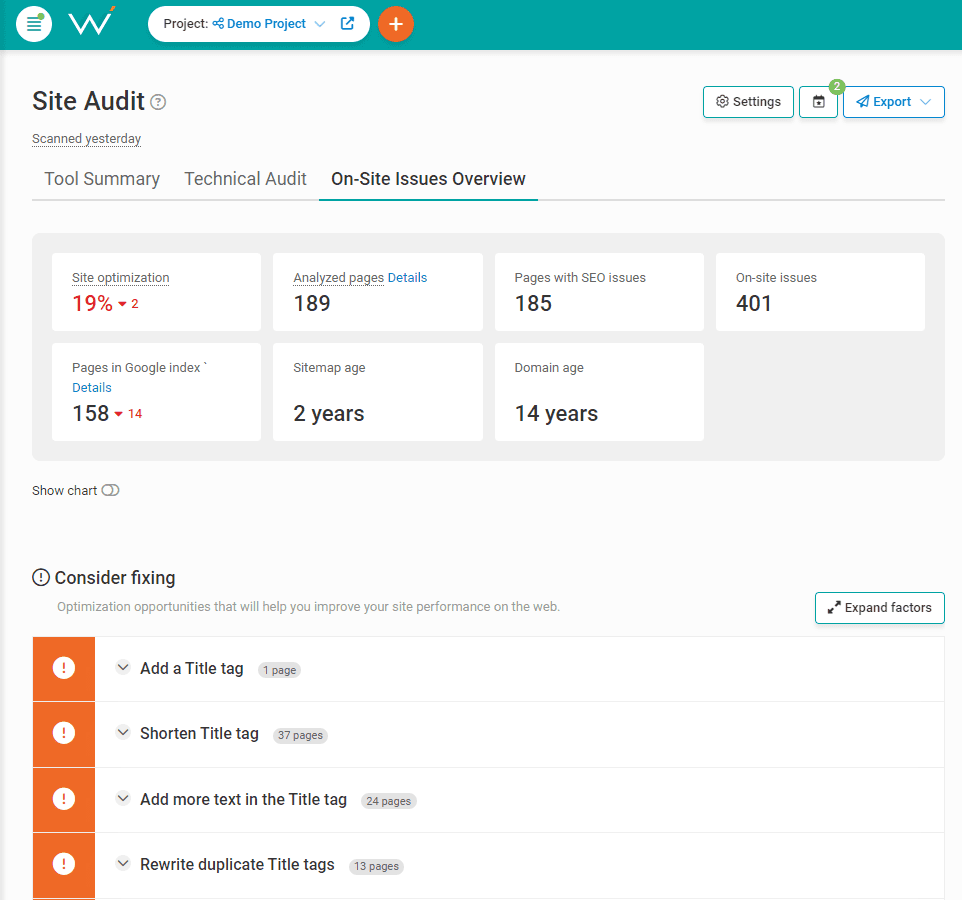
Site-level SEO Assistant is one new example of a real-time checklist.
This type of checklist is built directly into your CMS and includes entry points and integrations that allow users to complete tasks in the list.
From setting indexability to connecting to Google Search Console, you can complete important tasks from within the list itself.
With intelligent recommendations and the ability to skip tasks as necessary, this kind of checklist works in tandem with your website.
Built-in functionality like this can help you save time and get the most out of a CMS.
 Experience created by Wix, Feburary 2024
3. AI-Powered SEO Checklists
With the assistance of AI, you can get a dynamically generated checklist to help you execute your SEO workload.
Plus, this type of list can also help you carry out within the list itself, simply by using AI inputs.
For instance, the checklist in the Wix SEO Assistant uses a keyword prompt to create AI meta descriptions and title tags for a page.
Once these are generated, you can add and tick them off your list, right in the CMS.
 Experience created by Wix, February 2024
Looking at user data, we see that the addition of AI to a checklist can increase usability significantly.
How To Properly Use An SEO Checklist For Success
If you aren’t already using an SEO checklist to manage your workload, we urge you to try any of the above styles of checklist.
Increase Your Agency’s Profitability
If you’re an agency owner or account manager, checklists are particularly efficient because they can be reused and adapted for each client.
This can save time on research and development (R&D) and become part of the corpus of resources you make available to clients and staff.
Checklists for SEO tasks can also assist with more efficient onboarding for new clients and projects, and help you expand your offering and improve client satisfaction.
When managing clients, tools like the Wix Studio Client Kit mean that account managers can upload client checklists, templates, and even video tutorials directly into the dashboard of the CMS.
This means that materials for client success are accessible to everyone working on the site, at all times.
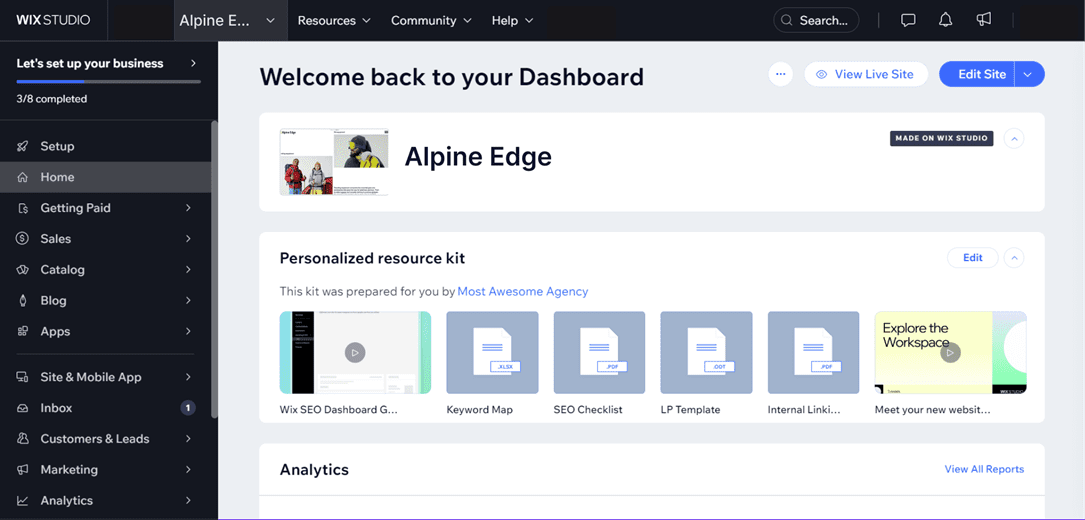 Image created by Wix, February 2024
If you’re managing SEO teams, creating frameworks for SEO account management can help you gain and retain clients for the long term.
Joshua George, founder of Clickslice Agency explains that he developed his SEO project proposal template “after testing 20 different variants of proposals,” but once he “finally found one which converts the best,” he was able to get better results from client pitches.
Similarly, freelance SEO, Nick LeRoy, developed a client retention checklist to manage touch points and habits that build client trust.
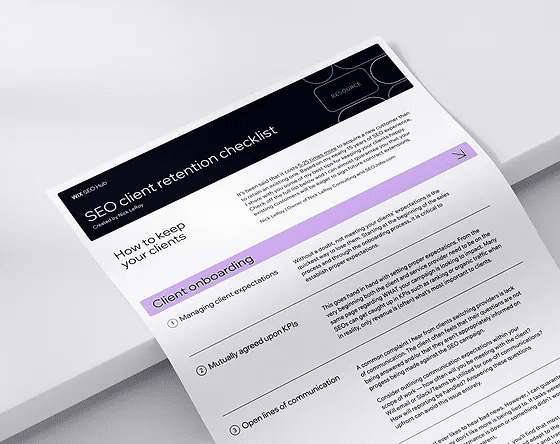 Image created by Wix, February 2024
Better efficiency for SEO agencies and freelancers means more opportunities to deliver high-value outcomes and increase profitability – a checklist can be an important part of that process.
Make Knowledge More Accessible Across Your Team
Templates and checklists are also a highly accessible way to hand off to juniors and even clients easily.
As well as being designed to help your team accomplish goals, checklists can also serve as a knowledge base to help your team grow. This approach can help you get drive visibility on the SERP.
 Image created by Wix, February 2024
Founder of AS Marketing agency, Adriana Stein, explains that she uses a blog writing template because, “when you use a particular structure, provide helpful information, as well as follow SEO best practices, that gives your content the best possible chance to rank, drive organic traffic, and when scaled out, drive conversions.”With live collaborative documents, teams can adapt lists to changing requirements and ensure that the knowledge base of the team continues to grow, even if account managers change roles.
Improve Quality Assurance
It is often assumed that it is beginner-level SEO specialists who use checklists, but this is not exactly the case.
For more seasoned SEOs, checklists often serve as a means of maintaining the quality of implementation when working with multiple teams and stakeholders. Experienced SEO professionals create checklists to ensure consistency of delivery when handing off day-to-day tasks to other members of their teams.
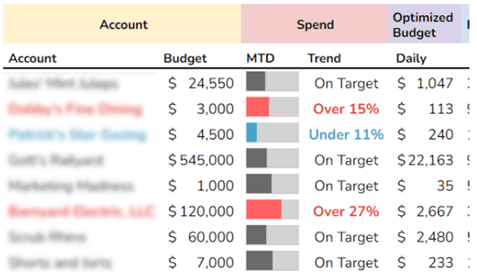
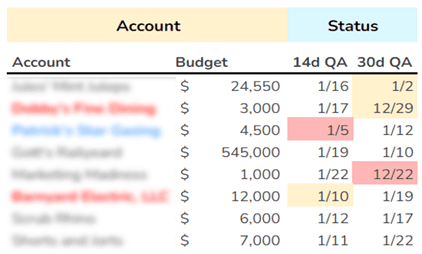
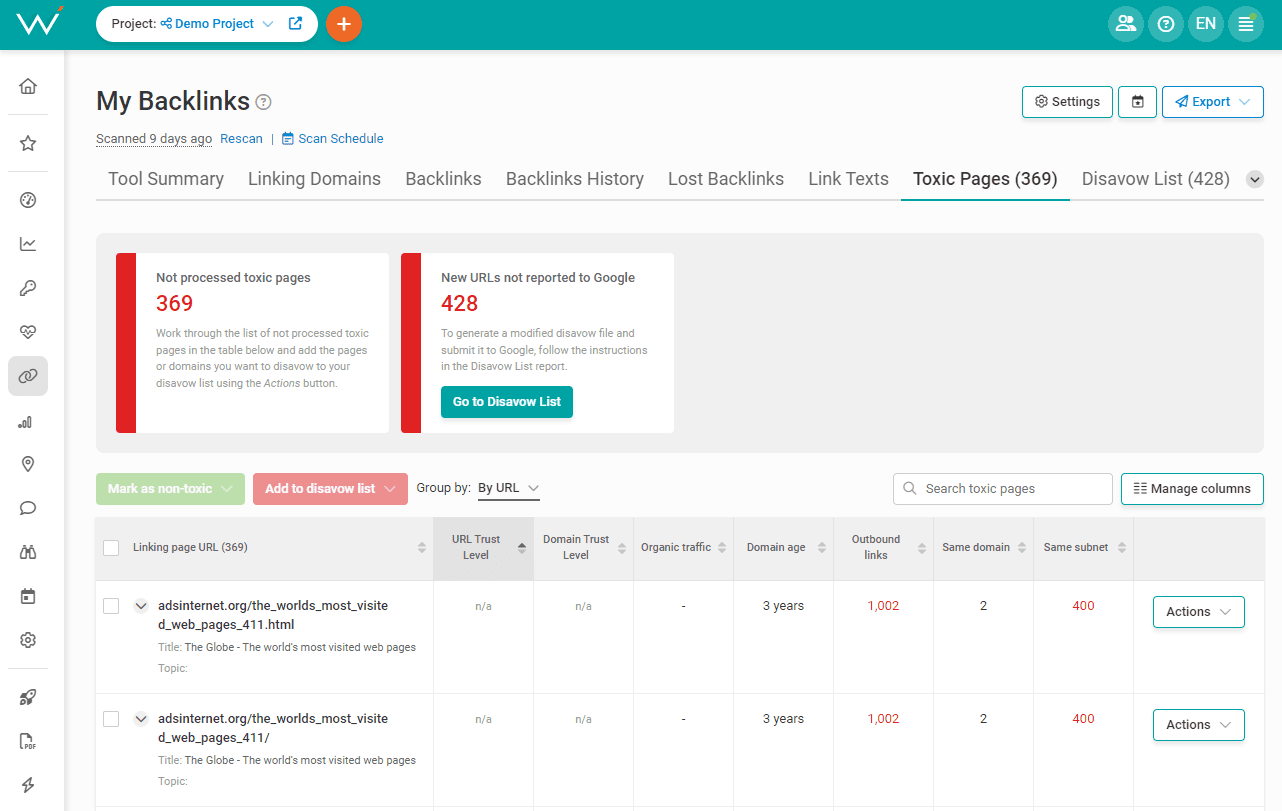
Ashwin Balakrishnan, Head of Marketing at Optmyzr, explains that for tasks like backlink tracking, he creates templated documents to reduce errors and ensure a consistent level of implementation.
Balakrishnan says that, “transferring knowledge and experience to junior SEOs (especially teammates) goes a lot smoother for everyone when you use checklists and templates. It gives newer SEOs confidence and frameworks to work off, and it allows more seasoned practitioners to review work faster and avoid giving arbitrary feedback.”
This can free up time for senior SEOs to pursue more complex SEO, billable tasks.
So rather than dying a death, the humble SEO checklist has evolved.
What’s Next For SEO Checklists?
Given the wealth of data sets, data feeds, automation, and AI tools available to marketers, the active integration of AI into SEO should only continue. But as well as being able to generate inputs, we are likely to see data-driven, AI-crafted guidance from checklists become more common.
Those who use checklists in the format of Google Sheets and MS Excel will benefit from generative native apps and enhancements in the AI workspace race. Being able to harness scripts, feeds, and add-ons is nothing new, but AI offers new scalability for task completion, offering new opportunities for growth but the value of the SEO checklist is alive and well in 2024.
Download checklists, templates, and toolkits to develop smoother SEO processes and ramp up productivity—on any project.
Image Credits
Featured Image: Image by Wix. Used with permission.